

1. Click the Vendor module from the main menu bar. If you don't find the Vendor you need from the search results, click the Add button on the bottom of the page. The New Vendor page is displayed.
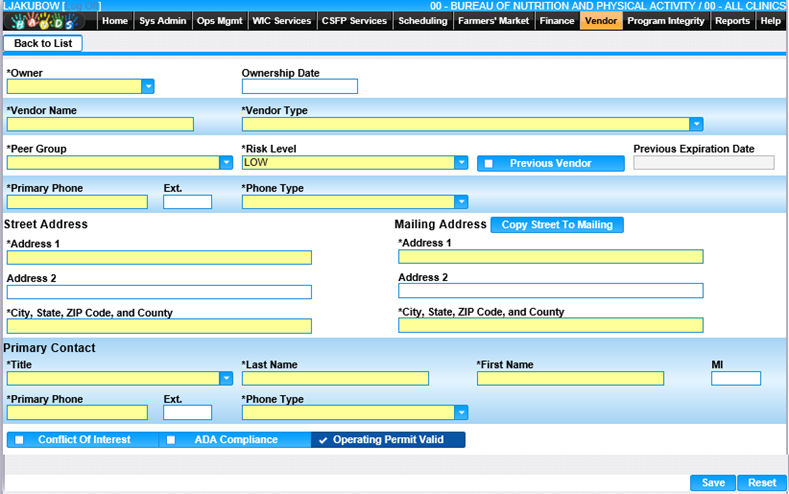
2. Select the Owner. (If the owner does not already exist in the list, you must create the owner. Refer to section: Owner Lookup).
3. Enter all required fields and any other applicable fields to create the Vendor.
4. If the applicant was previously a WIC vendor, select the Previous Vendor check box and, if known, enter the Previous Expiration Date.
Note: In the City, State, ZIP Code, and County field you can enter a zip code or the first few letters of the city and a list of matching data will display for you to choose from.
5. If the Mailing Address is the same as the street address, click the Copy Street to Mailing button. If the Mailing Address is different, enter the mailing address in the appropriate fields.
6. Select all applicable check boxes for Conflict Of Interest, ADA Compliance, and Operating Permit Valid.
7. To clear all entered values and begin again, click the Reset button at the bottom of the page.
8. To save the information entered, click the Save button at the bottom of the page.
9. To return to the Vendor Lookup page, click Back to List.